
No matter what type of business you have, a follow-up email is a great way to establish communication and improve your business.
This tutorial shows how to send emails to your subscribers right inside your ManyChat bot in 5 steps. No Zapier, no Integromat, no any other integrations required. Let’s have a more detailed look at it…
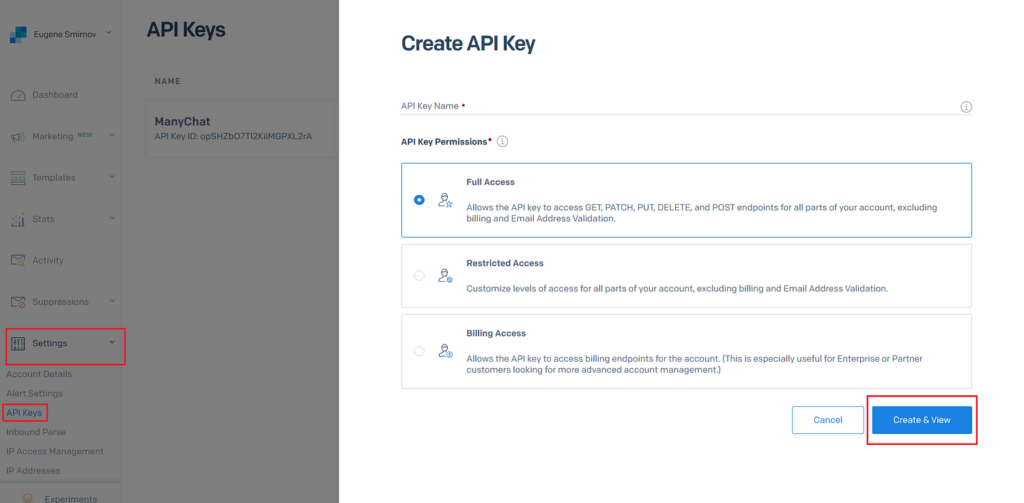
1. Create API Key in your SendGrid account
To create an API Key in your SendGrid account, go to ‘Settings’, choose ‘API Keys’ from the dropdown list and click ‘Create API Key’. Enter your Key name, choose ‘Full Access’ for Key permissions and click ‘Create & View’.
Note: do not copy the key at this moment, we’ll do it a bit later.
2. Collect Emails in ManyChat
In order to send emails from your ManyChat bot, you’ll need to collect them first. Add the flow that will ask users to leave an email and save it in a ManyChat custom field.
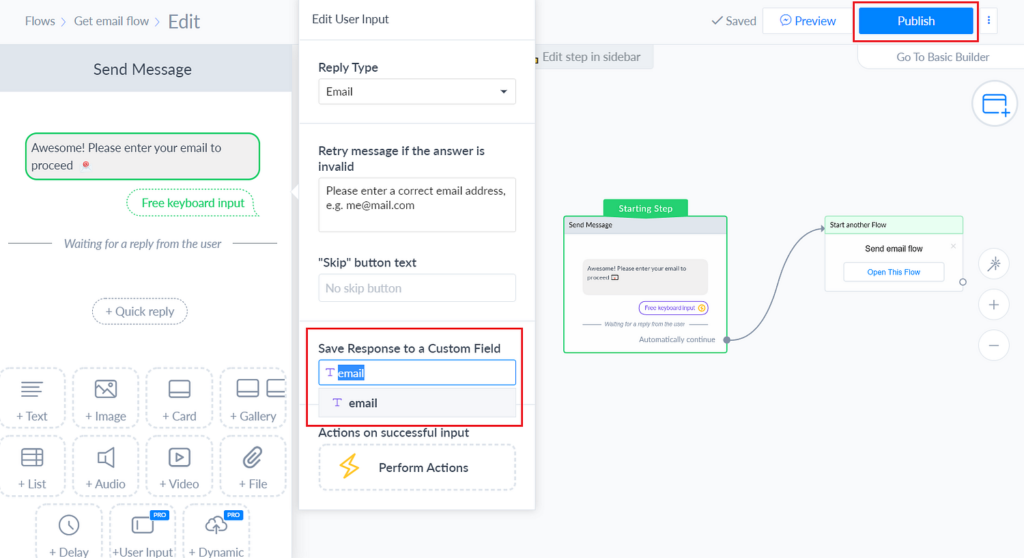
Once the flow is set up and published, don’t forget to start a conversation with your bot and enter at least one email in the ‘Get email flow’. It’s necessary to store some data in the ‘email’ ManyChat custom field.
3. Setting Up SendGrid API in ManyChat
To create an external request node you need to go to ‘Actions’ and choose ‘External Request’ (Pro ManyChat requires). Once you click on ‘Add your request’ button it will open the configuration window. In the configuration window you will need to add Request Type, Request URL, Key and Value in the Headers exactly how it looks at the screenshot below:
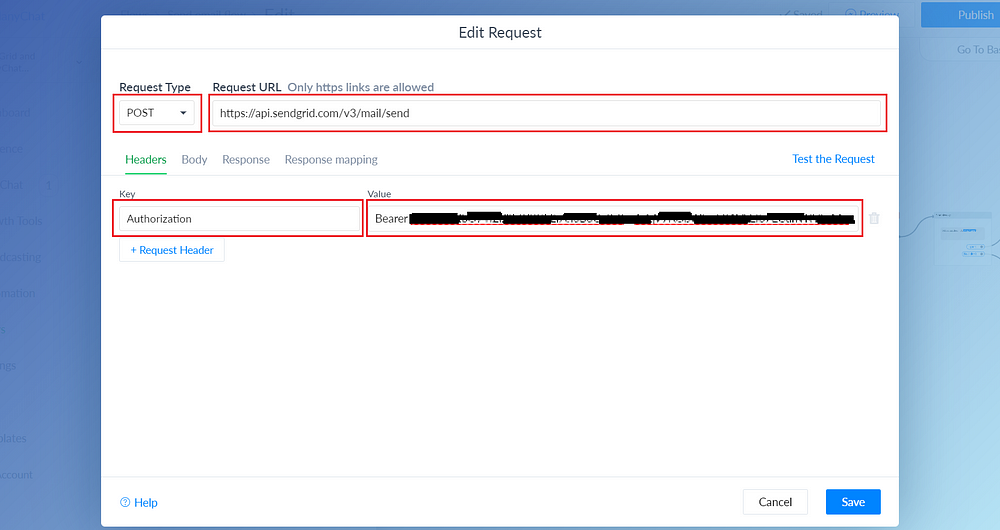
Request Type: POST
Request URL: https://api.sendgrid.com/v3/mail/send
Key: Authorization
Value: Bearer Your_SendGrid_API_Key_Here
☝️ Now is the time to copy the key from SendGrid.
Note: there should be a space between Bearer and Your SendGrid key.
4. Setting Up JSON code in ManyChat
After you have set up your request type, you need to set Body fields. Go to the ‘Body’ tab and paste the JSON code. Get the code via the link:
https://docs.google.com/document/d/1YTSBLX1fYAn4vGnXcRofVG48f3VX53_GlP1aDsIdnoI/edit?usp=sharing
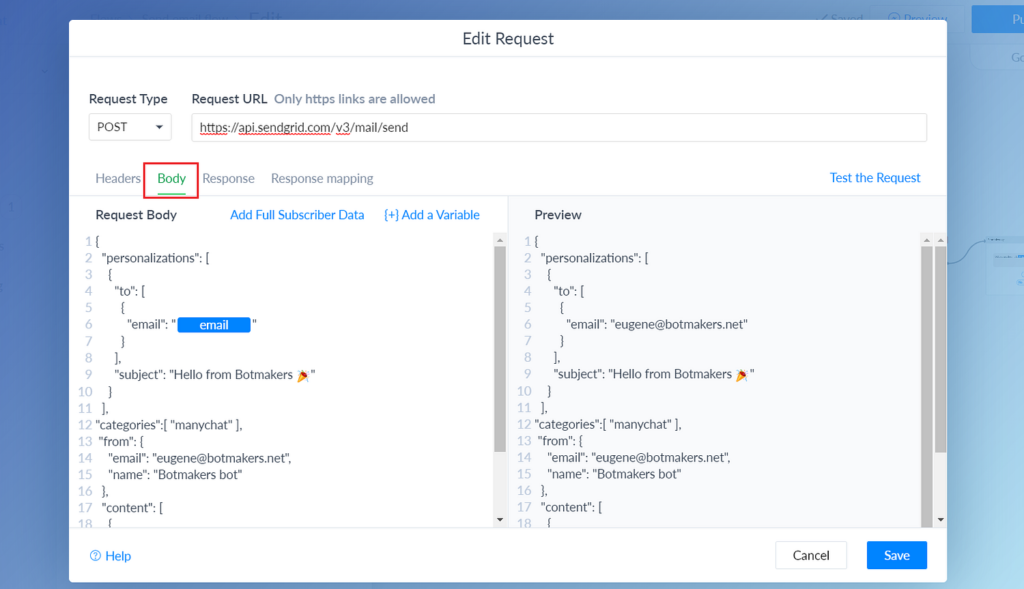
Note: you will need to manually add {{email}} custom field you created in your ManyChat earlier, and add your own data to “subject”, “email”, “name” and “value” fields.
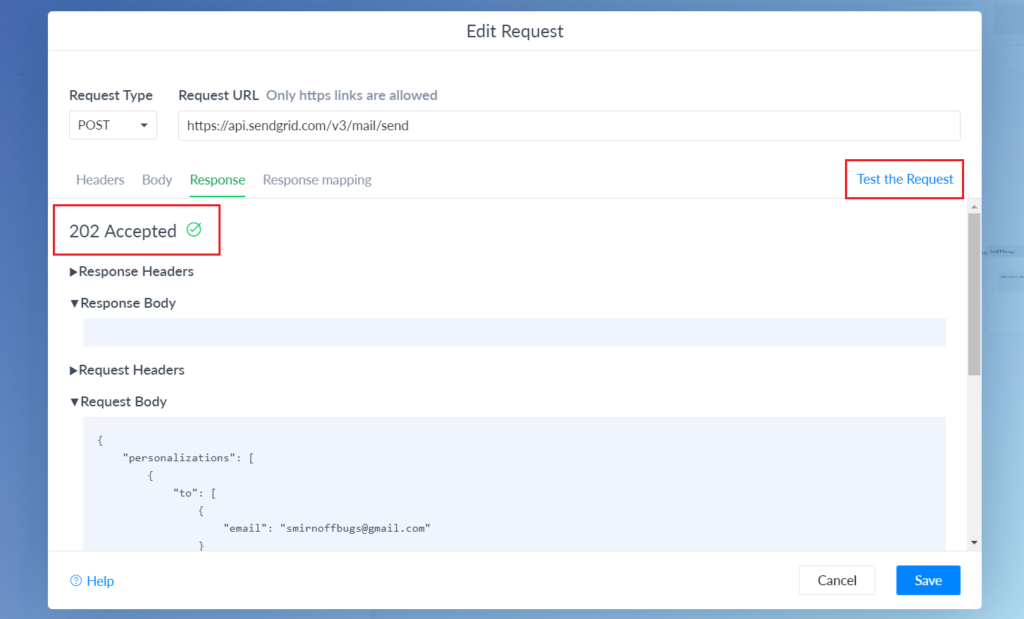
5. Finally! Testing the Request
When it is done you can test your request by going to ‘Response’ tab and click on ‘Test the request’. If everything is done correctly you will get 202 code like that 👇
👍 Congrats! You are all set 🎉
Combining bots and email is extremely powerful. We’re using the technology currently at Botmakers and now you can send emails to your bot subscribers effectively and with high open-rates as well.