
The new year is around the corner, and our Airchat team can’t leave you without a gift. We know you’ve been waiting for it — the possibility to add condition flows which make user interaction with your chatbot more variable and personalized. And you’re good to go with this superb feature right now!
Condition Flows for Boosted Personalization
If earlier you’ve sent all of your users to the common blocks, today, you can easily set required conditions that separate and redirect them according to their attributes or location.
The system checks whether a person matches the specified parameters (e.g., gender, country, the performance of a target action, type of business, etc.) and moves him/her to the appropriate flow. In case no condition is matched, another block is applied.
How to Use Condition Flows Efficiently
Condition flows allow you to segment the audience into several groups and present them with different proposals, messages, CTAs.
For example, by setting the condition with the attribute ‘user status is equal to lead,’ you ensure that your current leads won’t see the lead generation form when interacting with the bot.
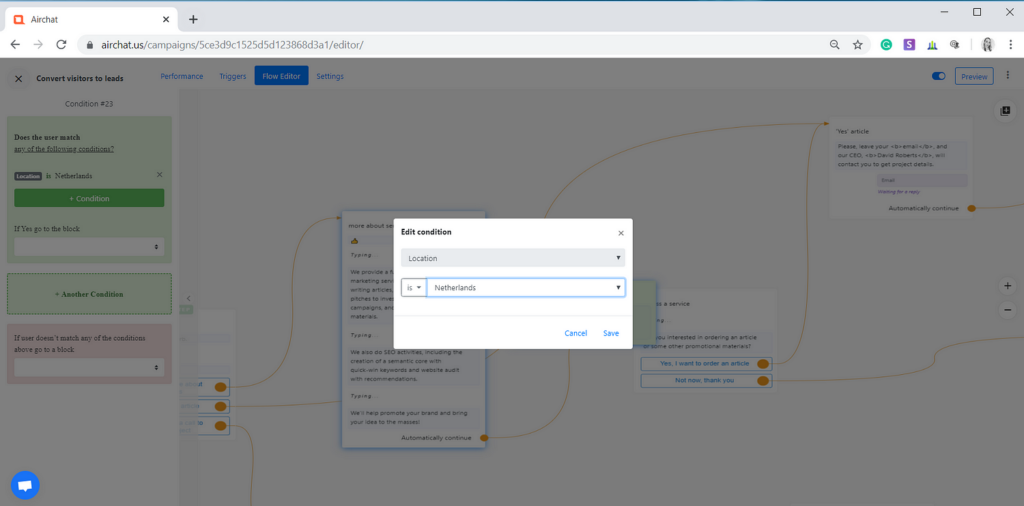
Another case is specifying the concrete locations that you want to cover or, vice versa, avoid. Let’s say the Netherlands is your target country. If you set a condition ‘Netherlands,’ the bot will check whether a user is (or isn’t) from there and apply the block with a conversion form explicitly designed for this area.
With this condition, you can also impose restrictions on some locations that you don’t want to deal with. When the bot detects that the user is out of your location focus, it will start the appropriate, most likely ‘farewell’ flow.
Transforming User Engagement with Advanced Condition Flows
Condition flows revolutionize how your chatbot interacts with users, creating dynamic conversations that feel natural and personalized. By implementing strategic condition flows, you can achieve remarkable improvements in user engagement and conversion rates.
Dynamic Response Patterns
Create sophisticated conversation branches that adapt based on user behavior:
- Previous purchase history triggers personalized product recommendations
- Chat duration influences the depth of information provided
- Time zone differences automatically adjust message timing and content
- User interaction frequency determines follow-up message intensity
Enhanced User Experience
Transform standard chatbot interactions into meaningful conversations:
- Welcome returning customers with their preferred products or services
- Adjust language complexity based on user expertise level
- Offer region-specific promotions and deals
- Customize support options based on subscription tier
Engagement Optimization
Leverage condition flows to maximize user interaction:
- Create urgency with time-sensitive offers for specific user segments
- Deploy personalized re-engagement sequences for inactive users
- Tailor product demonstrations to industry-specific use cases
- Generate custom feedback loops based on user satisfaction levels
Business Intelligence
Harness condition flows to gather valuable insights:
- Track user preference patterns across different segments
- Identify high-performing conversation paths
- Monitor conversion rates for specific user attributes
- Analyze engagement patterns across different geographic regions
Implementing these advanced condition flows creates a sophisticated chatbot experience that keeps users engaged while delivering measurable business results.
Implementation of the Condition Flow, Step-by-Step
Everything is much easier than you might think.
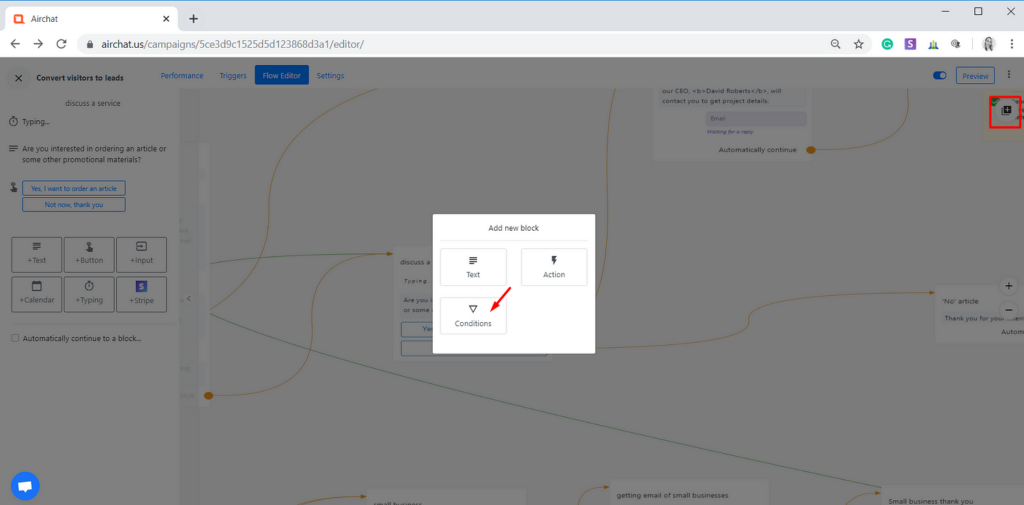
Step 1. First off, go to your admin panel and define the block where you need to make a segmented redirect from. Click on the ‘+’ button in the top right corner and choose ‘Conditions.’
Step 2. You have two formats of the conditions available: ‘User Field’ and ‘Location.’ Thus, you can set a parameter based on your existing user fields or geography. Select the required option.

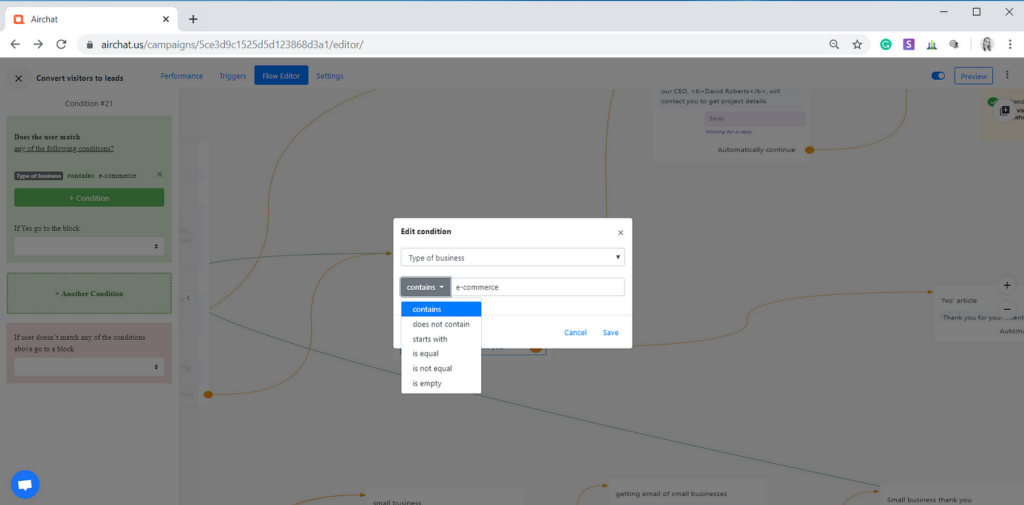
Step 3. Think about the attribute and input, which will serve as a conditional factor. For instance, you need to separate e-commerce businesses from other industries to show them another promotional message. For this, set a condition ‘Type of business’ — ‘contains’ — ‘E-commerce.’
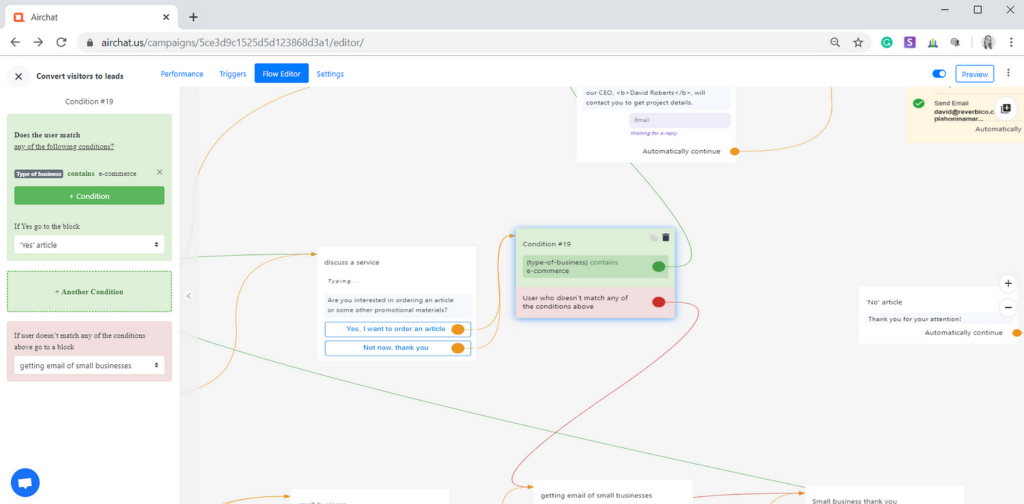
You can add more than one condition to segment users as precise as possible, by clicking on ‘+Another condition.’
Step 4. Choose the blocks that users will be redirected to in case of a match or mismatch. Let’s continue with an example of e-commerce businesses. The bot will check whether a person is saved in your user fields base under ‘e-commerce’ and move him/her to the specified block. Otherwise, another block will appear.
The same algorithm works in case of setting a condition by location, but instead of the ‘User field,’ you should select ‘Location.’
As you can see, dealing with conditions is as simple as adding a new text block while the areas of their application are genuinely unlimited.
Stay tuned with our further advancements on Airchat.us !