Now online store customers can discover products and seamlessly order and pay ahead for their orders using Facebook Messenger bots using a webview to list products, it’s easy-to-use and positively affect conversions.
The template was designed for footwear stores but, can be adapted for such e-commerce businesses, like clothing, beauty, accessory stores and similar, just by changing some copy and pictures.
Let’s set it all up!
1. Make a copy of this Google Sheets template and click the Share button in the top right corner of your screen so that your copy can be accessed by your ManyChat bot.
2. Change the settings in Google Sheets so that ‘Anyone with the link can view’. Copy the shareable link and paste it somewhere for now so you can access it.
3. Then, where it gives you the option to share with people, add the following email address: bot-sheets-service-account@botsheetsremover.iam.gserviceaccount.com
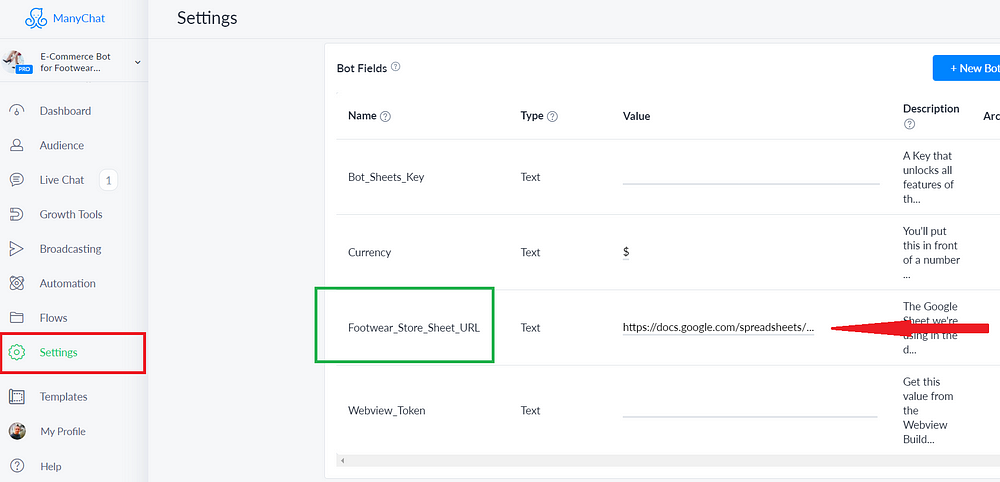
4. Go to the Settings/Custom Fields/Scroll down to the Bot Fields/Find Footwear_Store_Sheet_URL field and paste the shareable Google Sheets URL into the value field.
5. Grab your Botsheets Key and paste the key into the Bot_Sheets_Key field.
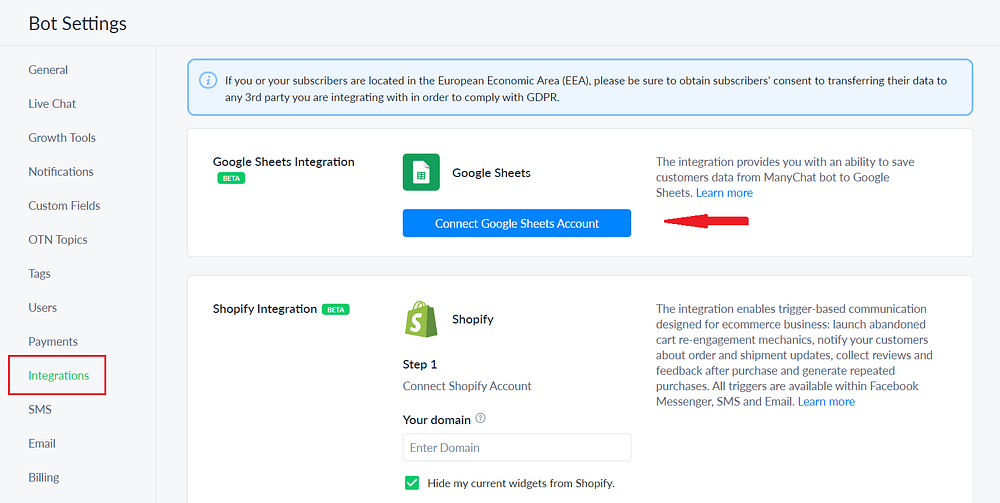
6. Set up Google Sheets integration by navigating to the ‘Integrations’ tab in your ManyChat Settings. Link to the Google account where you installed a copy of your Google Sheets.
7. Go to the flow named ‘4. Add to shopping bag: Step 2’ and click ‘Edit’. Find an action ‘Write to Sheet’ and click the action to edit it.
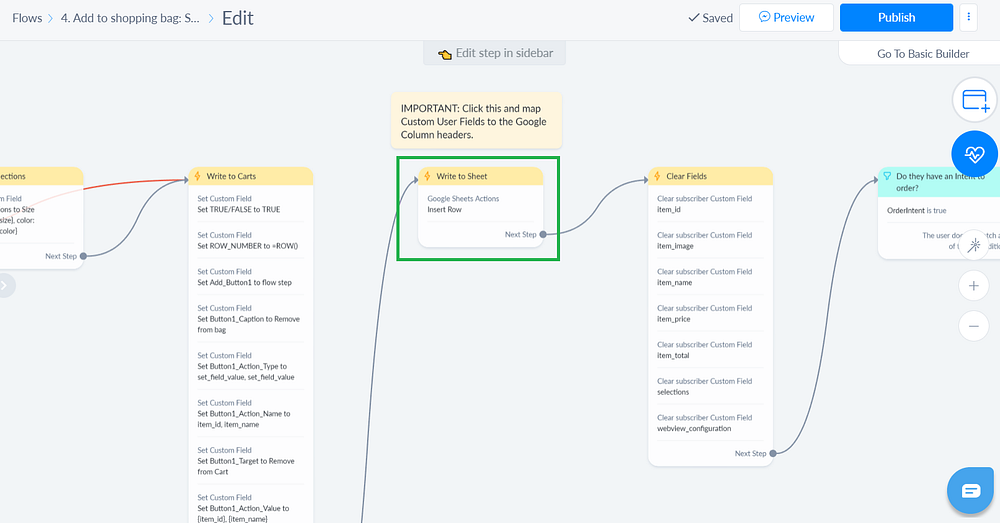
▪️ Choose your Spreadsheet and then choose the ‘Carts’ worksheet. Map Custom User Fields from Manychat to Google Sheets column headers.
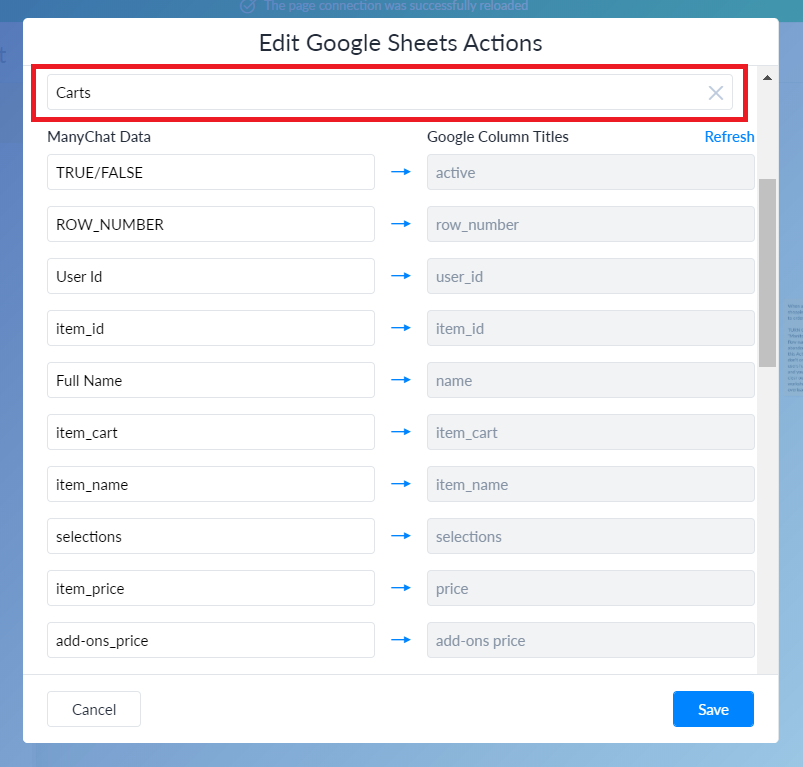
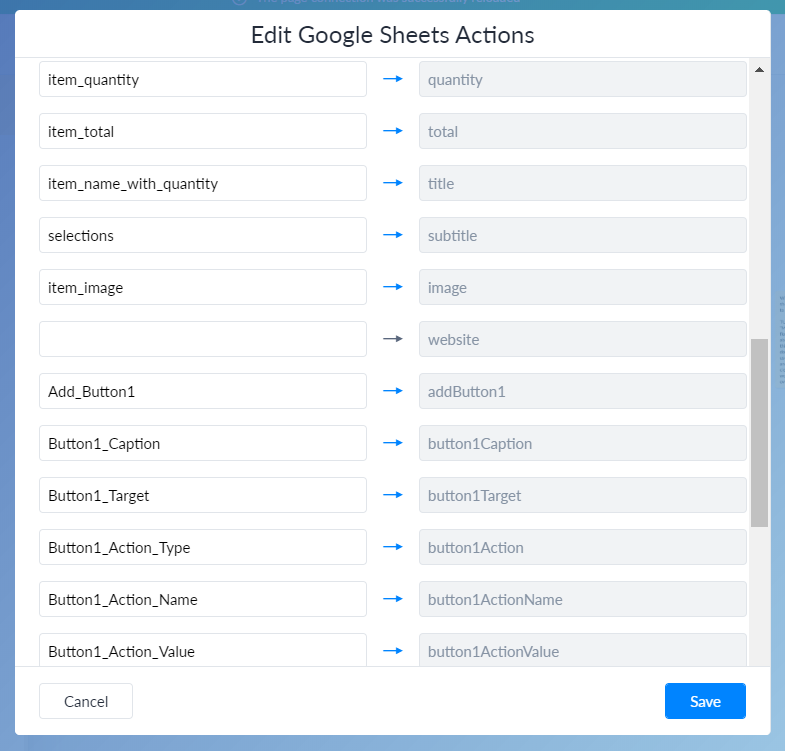
Add ManyChat data you see here 👆 so they map to the Google column titles. Click ‘Save’ and then, publish the flow.
You will be using the following Worksheets to manage your products, shipping options and promo codes:

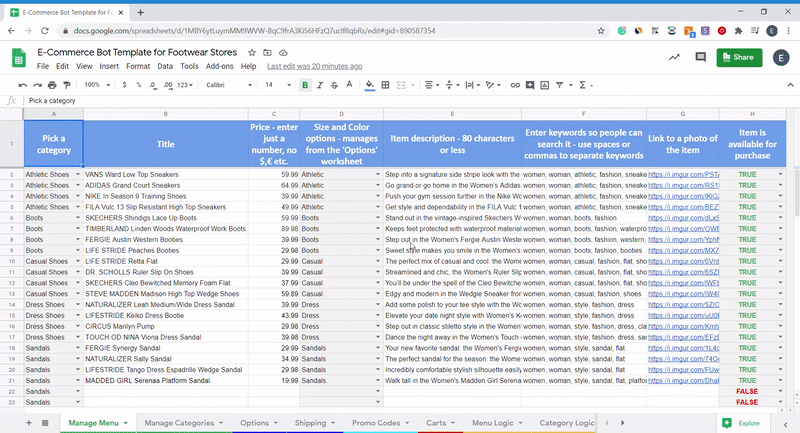
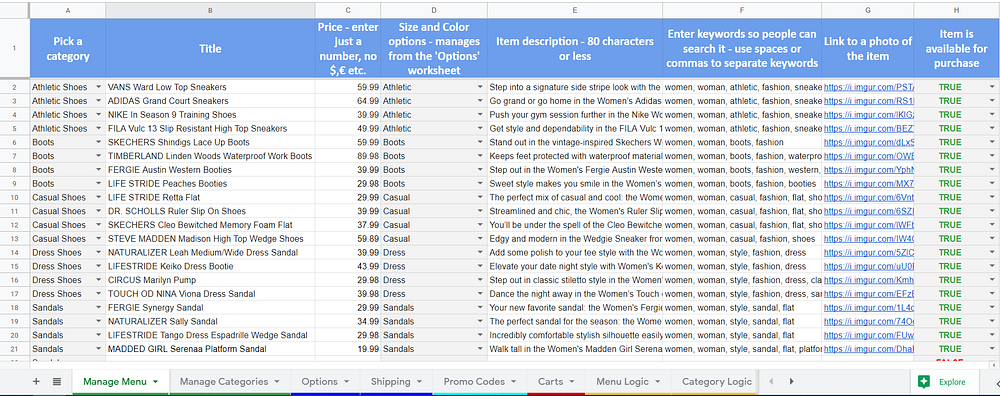
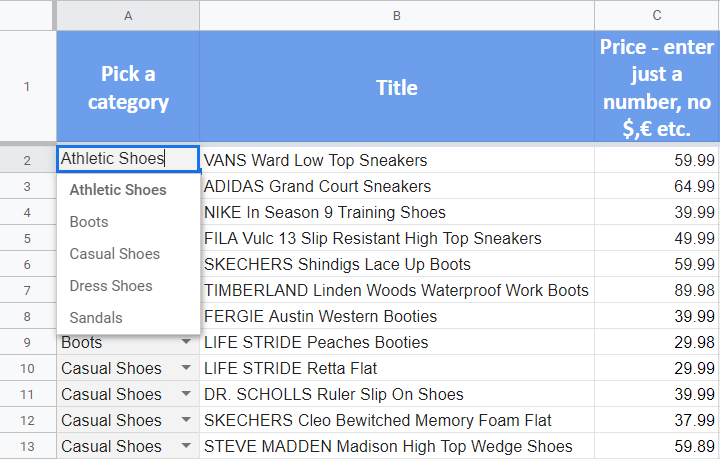
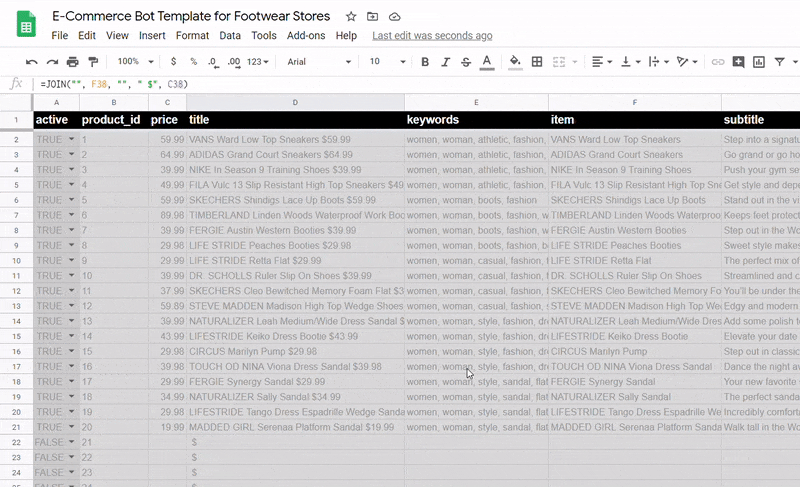
⚈ Manage Menu – this is a simple shop management interface. Add all items you’re selling here. Don’t change the order of the rows, just edit the rows and add data into new rows, or clear out data from rows you don’t need:
1️⃣ Pick a category
2️⃣ Enter an item title
3️⃣ Enter the cost, just a number
4️⃣ Add the option to choose size and color
5️⃣ Enter item description
6️⃣ Enter keywords so users can search it by keywords
7️⃣ Add a link to a picture
8️⃣ Make an item available or not in your ManyChat bot
⚈ Manage Categories – a list of categories for items you’re selling. The list is accessed from the ‘Manage Menu’ worksheet. Don’t change the order of the rows, just edit the categories or add new ones. You can change the category title and image, make a category active or not.

If you changed the category title, don’t forget to add the appropriate title in the ‘Manage Menu’ Worksheet 👇
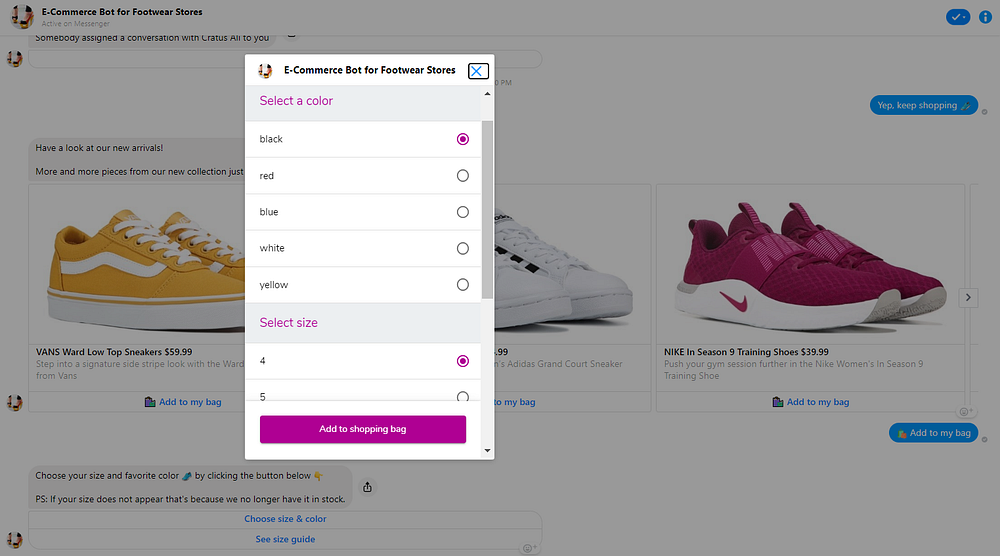
⚈ Options – this is to manage size and colors. If you add something to the “Price’ column, it’ll affect the base cost of the item. Options can be selected from a Webview if options are assigned to any item in the ‘Manage Menu’ worksheet. You’ll use the Botsheets to set up Webview options.
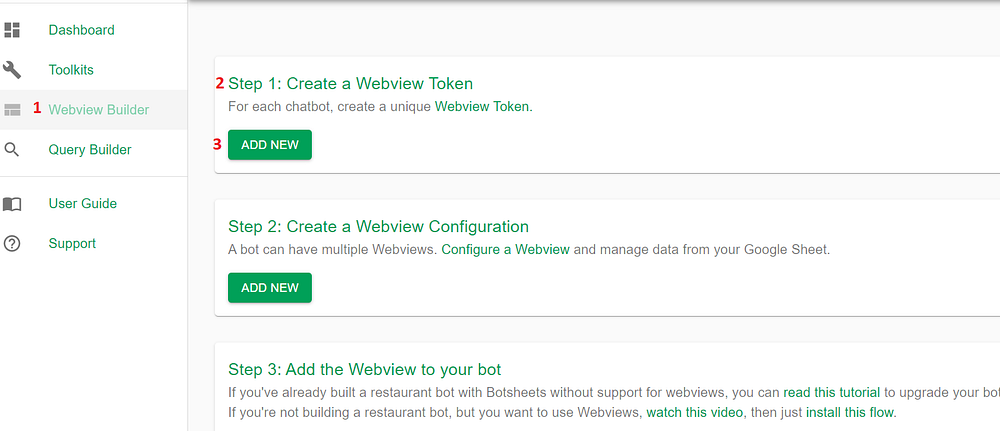
Step 1. Configure a Webview
Log in with your Google account on https://app.botsheets.com. Go to: Webview Builder/Create a Webview Token/Add New
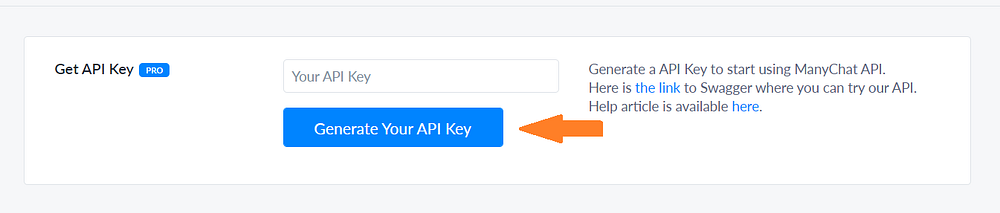
Generate and add your ManyChat API Key: ManyChat dashboard/Settings/API/Generate Your API Key
Paste your ManyChat Key, Botsheets Key, and click ‘Create’ in order to create a Webview:
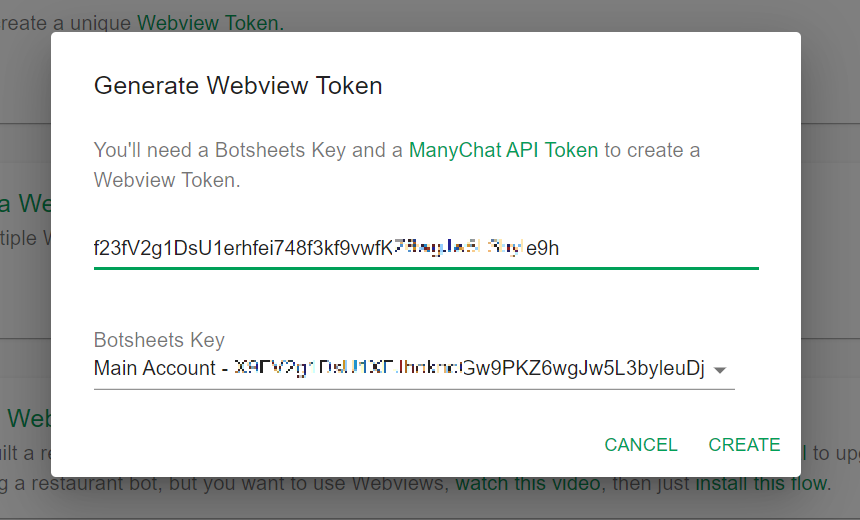
Once your Webview token is generated, copy it and add in your ManyChat dashboard/Settings/Custom Fields/Bot Fields/Webview_Token

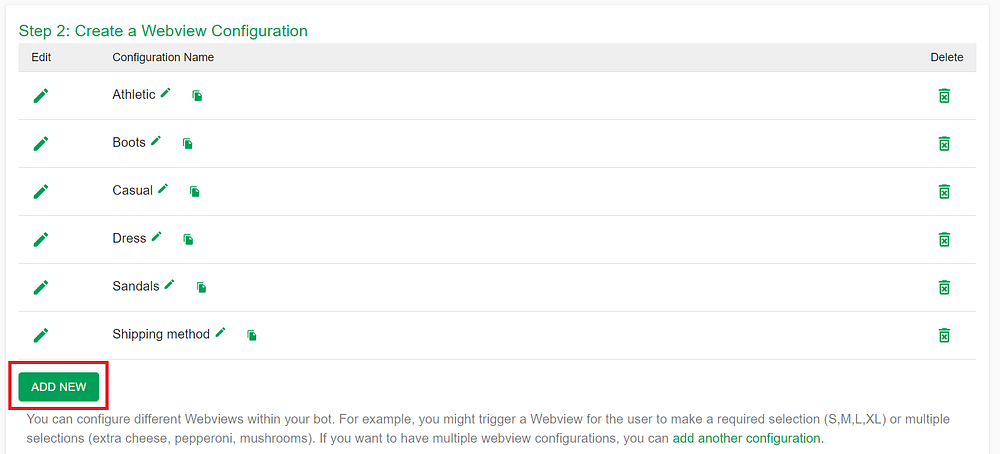
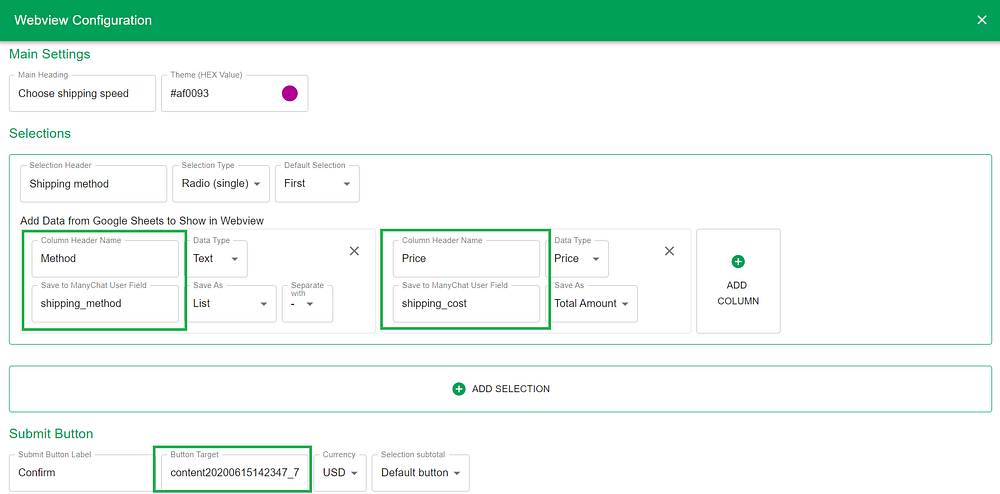
Step 2. Create a Webview
You can create different configurations for the same bot. For example, you might have a configuration for one type of shoes and a different configuration for different types of shoes.

Click ‘+’ to create a configuration or ‘Add New’ to add another one. ‘Configuration Name’ must be exactly like the name under ‘Webview Configuration’ in the ‘Option’ worksheet.
Choose ‘Start from Scratch’ and add appropriate data to the fields. Also, when users make selections, choose the appropriate custom fields to save that data.
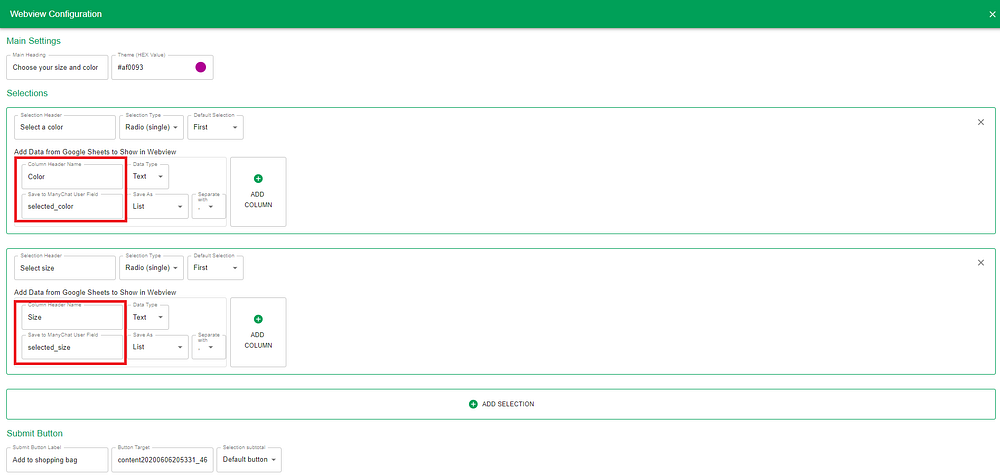
‘Column Header Name’ must be exactly like the header in the ‘Option’ worksheet.
‘Save to ManyChat User Field’ must contain the exact custom field (i.e. selected_color or selected_size).
If you’ll want to change any header in the worksheet, change the ‘Column Header Name’.

At the bottom of the configuration screen, you can see the ‘Submit Button’ options. Right after users pick a size and color, the bot asks for a quantity that leads to the ‘4. Add to shopping bag: Step 2’ flow.
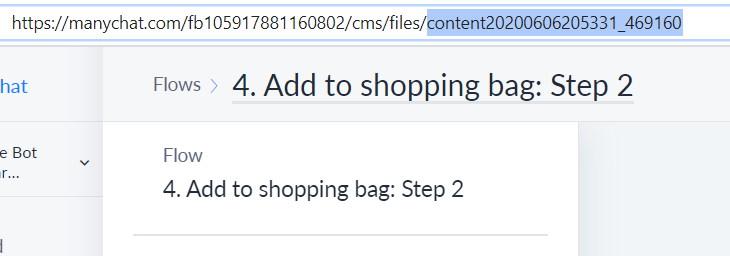
Find that flow, copy that content and paste it to the ‘Button Target’ field.
Test it out!
⚈ Shipping – These are shipping options that store value to Custom User Fields:
Method: {{shipping_method}}
Price: {{shipping_cost}}
You can change the shipping method to the list of countries you are shipping.
Complete the same procedure for shipping options like for size and color customizations (Step 2. Create a Webview).
⚈ Promo Codes – This worksheet manages discount codes for users. If the user tells the bot they have a promo code they will be prompted to enter the code, and if the code matches, the discount value will be saved and applied to the order. Values should be input as a decimal so it can be used for calculations. For example, if you have a code that provides 10% off, then enter 0.10
There are 3 other Worksheets in the template:
⚈ Carts – This stores the items that users add to their order (but have not yet ordered). Your bot will write the data to this worksheet. DO NOT enter data into this sheet manually. It’s dynamically populated by the chatbot and keeps track of everything users want to buy.
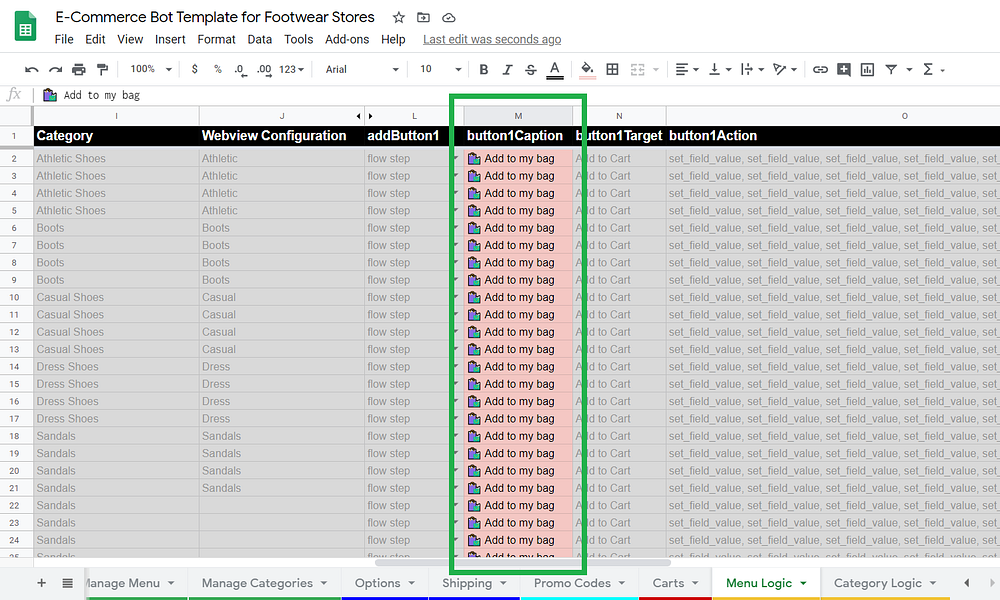
⚈ Menu Logic – This will generate a dynamic gallery using data in the Shop sheet and communicates with your Manychat flows. It’s really an advanced mode and most cells are greyed out meaning you shouldn’t edit them. It’s important that all rows have a product_id that matches what’s in the Manage Menu worksheet. The only column is red-colored can be customized in order to change the button name.
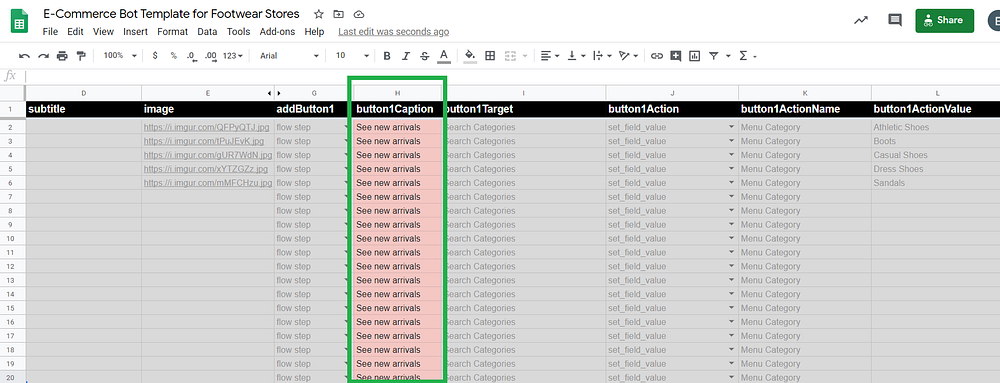
Category Logic ⚈ Similar to the Menu Logic worksheet, but specific to product categories. You don’t need to edit the worksheet as it contains logic. The only column is red-colored can be customized in order to change the button name.
❗ Please note, do not rename the worksheets. The names are required as Manychat flows make requests based on worksheet names.
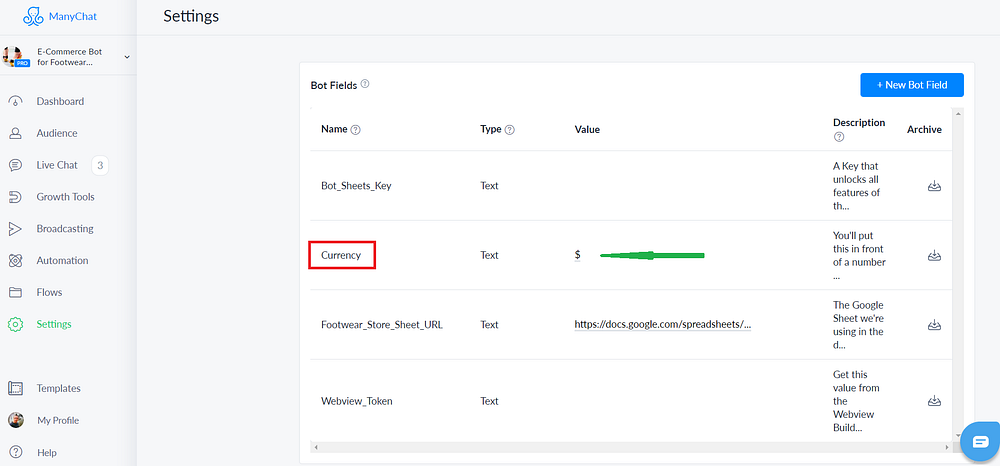
Change currency if necessary 💵💶💷
The default currency is $ but you can switch the currency if necessary.
First, you will need to set up a Bot Field in your ManyChat settings for currency: Settings/Custom Fields/Bot Fields/Currency
Second, go to the ‘Menu Logic’ worksheet and click the first cell in the title column, then edit the currency symbol in the Google Sheets formula bar. Grab the dot in the corner of the cell and drag that all the way down to the bottom of the sheet, so the formula is applied to every cell in the title column.
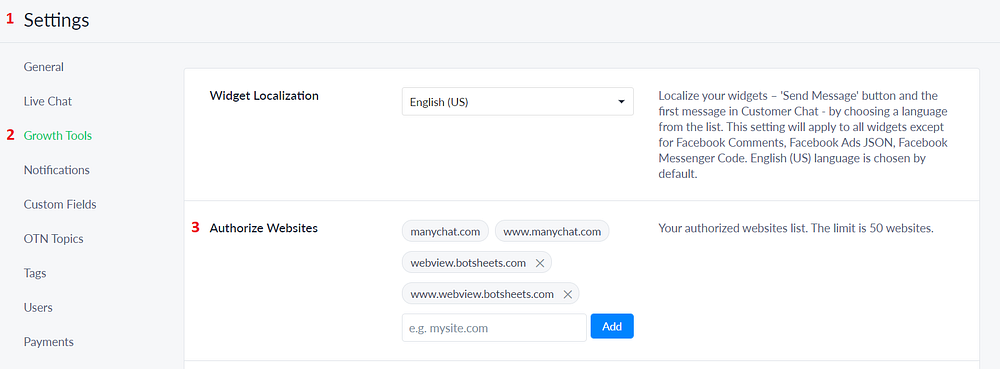
🏁 Finally, you’ll need to URL to Manychat settings to allow the Webview automatically close: ManyChat dashboard/Settings/Growth Tools/Authorize Websites/add webview.botsheets.com
All these efforts you’ll only need when setting it all up. Once it’s done, you’ll just manage all these in your Google Sheets template, so test it out right away!